# Short answer: the three squares are where scanning starts
Your camera does not see a "code". It sees an ordinary photo: millions of pixels, countless black-and-white edges — curtains, the fabric of a sofa, the letters of a newspaper, the grain of a wooden table. Among all that black and white, where should it start? Which regions are "data" and which are just the real world being itself?
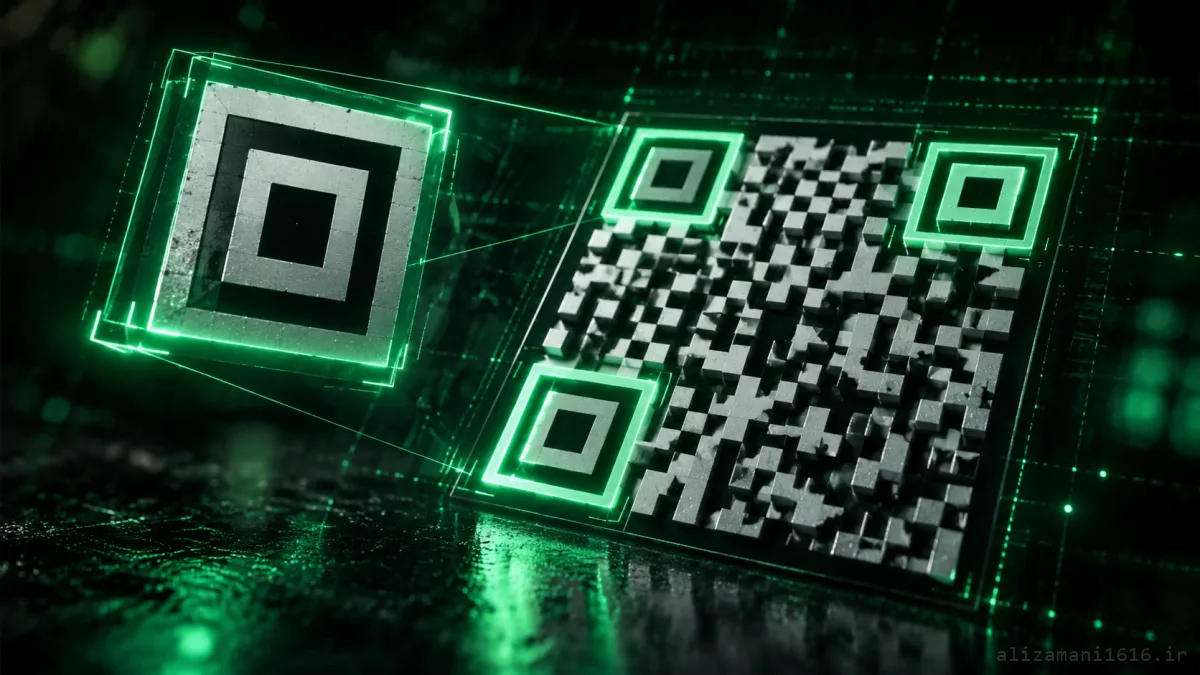
The answer is those three squares. Their official name is the Finder Pattern, and they do three jobs, each of which depends on the others:
Finding — they tell the camera "this black-and-white checkerboard is a QR code; not shirt fabric, not the shadow of a fence".
Orientation — the empty corner reveals which side is the "top" of the code, because a QR code must be read from one specific direction.
Scale — the distance between the squares tells the scanner how many pixels each small module of the code spans in this particular photo.
Here is the scanner's full sequence, from the moment a photo is taken to the moment the link opens:
1
Find the three squares — search for the "square inside a square" signature
2
Take orientation from the empty corner — the corner without a square is bottom-right
3
Draw the grid from the dashed rulers — now you know where every module sits
4
Read module by module — the black and white cells are no longer "photo"; they are bits
One important asymmetry lives right here: the data inside the code can be stained, scratched, or hidden under a coffee cup — the scanner has a way to recover it. The three squares cannot be recovered at any level, because they are needed before every recovery step.
# Why is scanning hard in the first place?
To see what problem these three squares solve, first look at the problem. The linear barcode on store products is read with a laser: the laser sweeps one straight line across the barcode and counts the widths of the black stripes. Its job is easy because the barcode is one-dimensional: only its length carries meaning; its height is irrelevant. The result? A capacity of a few characters, readable from exactly one direction.
QR removed all of these limits at once: a matrix instead of a line, a camera instead of a laser, any direction instead of one. But that freedom had a price: the camera shoots from any distance and any angle, and in a photo, everything resembles everything else. A QR code without its guiding squares is just a huge pile of black-and-white edges: the data is in there somewhere, but nothing tells you which module to start reading from.
Linear barcode
One-dimensional; read by a laser from one direction; about 13 digits in the retail standard (EAN-13); essentially zero damage tolerance — one scratch, game over
QR code
Two-dimensional; read by a camera from any angle and distance; up to 7,089 digits in the largest version; 7% to 30% damage tolerance through error correction
# The story: a Toyota factory and a Go board
In 1994, at the factories of Denso — a Toyota group company in Japan — an engineer named Masahiro Hara had a tedious problem: tracking car parts. Linear barcodes had little capacity, had to be scanned from exactly one direction, and each part needed several labels. Hara and his team wanted something that could be read at a glance — from any side.
The idea came from an old game: the Go board. Black and white stones on a regular grid. The team started designing that same night, and the result is what we now call the QR Code: Quick Response — because it was meant to be read in a fraction of a second.
The numbers show the scale of the decision: a retail barcode holds 13 digits; the largest QR version holds up to 7,089 — more than five hundred times as many. And it comes in 40 sizes, from 21×21 modules to 177×177, all following one rule: the larger the version, the more room for data.
But perhaps the most consequential decision had nothing to do with the code itself: Denso released its patents on the published standard. That administrative decision is what let QR travel royalty-free from a Toyota factory to the menu of a corner café.
# The full map: everything in its place
Now that we know why QR exists, let's look at its complete map — because a real QR code contains more than three squares and data, and every piece has one specific job:
| Piece | Where it lives | What it does |
|---|---|---|
| Quiet zone | White margin around the whole code | Separates the code from its background — 4 empty modules on every side |
| Finder patterns ×3 | Three corners | Finding, orientation, scale — the subject of this article |
| Separators | White ring around each square | Keep the squares from blending into the data |
| Timing pattern | Row and column 6, dashed | An alternating dash line; marks the module grid step by step |
| Alignment pattern | Near the empty corner (large versions only) | Compensates for lens distortion and curved surfaces |
| Format strip | Beside the squares | Declares the error-correction level and the chosen mask |
| Data + error correction | Everything else | What we call "the content" |
Where is the fourth square? The empty corner I mentioned is not truly empty — more precisely: it has no large square. In larger QR versions, a smaller square (the alignment pattern) sits near that corner and compensates for image distortion; it is deliberately small so it can never be confused with the main finders. But in the smallest version (21×21) even that one is absent — because with three squares, the job of finding and orienting is already done.
# Why three, not four?
Now we reach the title's question: why exactly three squares — three squares sitting in only three corners, with the fourth corner deliberately left without one?
What about two squares? You would get position and scale — the distance between two points tells the scanner how many pixels each module spans. But two ambiguities remain: mirroring and rotation. The code would not know which side is "up"; and reading the bits backwards means producing meaningless data.
What about four? This is where our intuition fails. Four squares in four corners would make the code perfectly symmetric: a 90-degree turn produces exactly the same picture. The scanner would have no way to tell which row is the first row. Symmetry is the enemy of reading.
And three? Three squares form the shape of an L — and an L is not symmetric. The empty corner is a sign all by itself: whichever corner lacks the large square is bottom-right. No mirror ambiguity, no rotation ambiguity.
There is a geometric bonus, too: once the scanner has the three corner positions in the photo and knows the code is square, it can compute where the fourth corner must be — even if it is not visible. With those three points alone, the scanner can compensate for the tilt of the photo (perspective) and "flatten" a slanted QR on a shop window in its mind, then read it.
So the number 3 is exactly the sufficient minimum: any fewer leaves ambiguity, any more brings symmetry and wastes space. Three squares are the algebraic sum of a need the code has and a symmetry it must not have.
# Why this exact shape? The 1:1:3:1:1 signature
Fine — the squares answer "where". But why is their shape so odd? Wouldn't a plain black square have been simpler? Every finder pattern is 7×7 modules: a 3×3 black core in the middle, a white ring around it, and a black frame around that. And here lies the core design decision: every line — horizontal or vertical — passing through the middle of this shape produces the same ratio: black 1, white 1, black 3, white 1, black 1. That is 1:1:3:1:1.
This ratio has three vital properties:
It is independent of size. Shrink the code or grow it — the ratio does not change; line lengths change, the ratio does not. One signature is enough for all 40 versions.
It is rare in nature. You will rarely find it in ordinary photos: shirt fabric and sofa patterns do not carry this precise 1-1-3-1-1 alternation.
It survives blur. Even when the photo is so distant that each module spans two or three pixels, the ratio stays readable — because the middle segment is three times the others, and a little edge blur does not break it.
To be honest: a line of data could, by coincidence, produce the same ratio — a QR code cannot prevent accidents. That is why the scanner, after finding each 1:1:3:1:1 signature, runs a 2D check as well: is there really a "square inside a square" sitting here? The ratio is the fast first filter; the full shape is the final confirmation.
# When half of it is under a coffee cup: error correction
Now that we know how the scanner "finds" the code, the next question is: why does it still "read" it when it is stained? The answer is an algorithm called Reed-Solomon — the same family of mathematics that let CDs survive scratches and kept the Voyager spacecraft's signal intact across billions of kilometers.
You can grasp its core idea through systems of equations: two equations are enough for two unknowns. But if you write four equations, losing one (or two) does not harm the answer — the rest keep it alive. A QR code stores such "extra equations" alongside its real data; the scanner uses them to reconstruct the missing modules.
Each code commits to one of four error-correction levels up front and declares it in its format strip:
| Level | Recovery capacity | Where it is used |
|---|---|---|
| L | 7% | Billboards and open spaces — maximum data capacity |
| M | 15% | The default for most codes |
| Q | 25% | Tickets and receipts — paper that gets folded and rubbed |
| H | 30% | Business cards — where a logo is printed over the code |
The trade-off is clear: the higher the correction level, the less room for data. And so that the data itself does not accidentally mimic forbidden patterns, eight "mask" patterns exist that checkerboard the data — a detail we only point at here.
But remember: the squares are covered by none of these levels. They are needed before error correction even begins — which is exactly why a white margin, separators and a quiet zone are drawn around them: let the data get stained; the skeleton must not.
# With Python: build it first, then stand where the scanner stands
Enough talk — to the code. First we draw the map of a 25×25 code: just three squares, two dashed rulers, and random data. No libraries at all, only to see what "looking like a QR" means:
qr_map.py
# qr_map.py - draw what a scanner needs: only the three squares
import random
N = 25 # a real QR "version 2" size
g = [[0] * N for _ in range(N)] # 0 = light module, 1 = dark module
def finder(r, c):
"the 7x7 landmark: dark frame, light ring, dark core"
for i in range(7):
for j in range(7):
frame = i in (0, 6) or j in (0, 6)
core = 2 <= i <= 4 and 2 <= j <= 4
g[r + i][c + j] = 1 if frame or core else 0
for r, c in [(0, 0), (0, N - 7), (N - 7, 0)]: # three corners only
finder(r, c)
# timing patterns: dashed rulers on row 6 and column 6
for k in range(8, N - 8):
g[6][k] = 1 if k % 2 == 0 else 0
g[k][6] = 1 if k % 2 == 0 else 0
# everything else is data
random.seed(11)
for r in range(N):
for c in range(N):
near_finder = ((r < 8 and c < 8) or
(r < 8 and c >= N - 8) or
(r >= N - 8 and c < 8))
if not near_finder and r != 6 and c != 6 and random.random() < 0.45:
g[r][c] = 1
for row in g:
print(''.join('█' if v else '·' for v in row))
output.txt
# the printed grid, rendered visually
Look at it. No processing behind it — and yet we instantly say "this is a QR code". Three squares in three corners, the dashed row and column six, and the rest is raw data. That alone is enough for a single glance to separate the squares and rulers from the data.
Now stand where the scanner stands. The script below does what a real scanner does in its first second: it sweeps every row and column looking for the 1:1:3:1:1 signature, clusters nearby hits (a single coincidence is not a real signature — a real square signs from six directions), and locks orientation from the empty corner. Then comes the damage test: first we stain the data, then we erase one of the squares themselves:
qr_find.py
# qr_find.py - stand where the scanner stands: find the three squares
import random
N = 25
def build():
g = [[0] * N for _ in range(N)]
def finder(r, c):
for i in range(7):
for j in range(7):
frame = i in (0, 6) or j in (0, 6)
core = 2 <= i <= 4 and 2 <= j <= 4
g[r + i][c + j] = 1 if frame or core else 0
for r, c in [(0, 0), (0, N - 7), (N - 7, 0)]:
finder(r, c)
for k in range(8, N - 8):
g[6][k] = 1 if k % 2 == 0 else 0
g[k][6] = 1 if k % 2 == 0 else 0
random.seed(11)
for r in range(N):
for c in range(N):
near_finder = ((r < 8 and c < 8) or
(r < 8 and c >= N - 8) or
(r >= N - 8 and c < 8))
if not near_finder and r != 6 and c != 6 and random.random() < 0.45:
g[r][c] = 1
return g
def signature(cells):
"run lengths of a 7-cell line: the finder's fingerprint is 1:1:3:1:1"
runs, cur, n = [], cells[0], 1
for v in cells[1:]:
if v == cur:
n += 1
else:
runs.append(n)
cur, n = v, 1
runs.append(n)
return runs
def find_finders(g):
hits = [] # (row, col) of signature hits
for r in range(N): # horizontal sweep
for c in range(N - 6):
win = g[r][c:c + 7]
if win[0] == 1 and signature(win) == [1, 1, 3, 1, 1]:
hits.append((r, c + 3))
for c in range(N): # vertical sweep
for r in range(N - 6):
win = [g[r + k][c] for k in range(7)]
if win[0] == 1 and signature(win) == [1, 1, 3, 1, 1]:
hits.append((r + 3, c))
clusters = [] # group nearby hits
for h in sorted(hits):
for cl in clusters:
if abs(h[0] - cl[0][0]) <= 1 and abs(h[1] - cl[0][1]) <= 1:
cl.append(h)
break
else:
clusters.append([h])
solid = [cl for cl in clusters if len(cl) >= 4] # one hit = coincidence
return [tuple(round(sum(p[i] for p in cl) / len(cl)) for i in range(2))
for cl in solid]
g = build()
first = next((r, c) for r in range(N) for c in range(N - 6)
if g[r][c] == 1 and signature(g[r][c:c + 7]) == [1, 1, 3, 1, 1])
print(f"signature found at row {first[0]}: "
f"{' '.join(map(str, signature(g[first[0]][first[1]:first[1]+7])))}")
squares = find_finders(g)
print(f"squares found: {len(squares)}")
for r, c in sorted(squares):
print(f" corner center at (row {r}, col {c})")
empty = {(3, 3), (3, N - 4), (N - 4, 3)} - set(squares)
if len(squares) == 3:
print("missing corner: the one WITHOUT a square -> orientation locked")
# damage test: scribble on random data cells
random.seed(99)
scratched = 0
while scratched < 30:
r, c = random.randrange(N), random.randrange(N)
if (r, c) not in {(3, 3), (3, N - 4), (N - 4, 3)}:
g[r][c] ^= 1
scratched += 1
after = find_finders(g)
print(f"after scratching 30 data cells: squares found = {len(after)}")
# worse: erase one landmark completely
for i in range(7):
for j in range(7):
g[i][j] = 0
lost = find_finders(g)
print(f"after erasing the top-left square: squares found = {len(lost)}")
output.txt
signature found at row 2: 1 1 3 1 1
squares found: 3
corner center at (row 3, col 3)
corner center at (row 3, col 21)
corner center at (row 21, col 3)
missing corner: the one WITHOUT a square -> orientation locked
after scratching 30 data cells: squares found = 3
after erasing the top-left square: squares found = 2
Read the output line by line — the whole article fits in six lines. The signature was found; three squares in three corners; the empty corner locked the orientation. Thirty stains on the data? The squares still stand — meaning the scanner still knows where to start and the code is still readable. But erase one square and only two signatures remain — and two diagonal signatures give neither a reliable scale nor an orientation: the scanner has nowhere to start.
That is exactly why a coffee stain in the middle of a restaurant menu is harmless, while a band-aid on a corner of the code makes it useless.
# Lab: be the scanner
Your turn. The 25×25 code is drawn right here in your browser and the scan line hunts for the 1:1:3:1:1 signature. Rotate the code, throw stains on it, or erase one of the squares — and watch what the scanner understands in each state, and what it loses:
qr_lab.exe — interactive
The 25×25 code is drawn here with Canvas — the same logic as the article's Python script.
Press a button…
Is the code always facing you in the real world? No. Using those same three squares, the scanner recovers the geometry of the tilt and straightens the code in its mind — before reading a single bit. In the lab, too, the code straightens itself after every successful scan: exactly what a scanner does with perspective.
# And then, the three squares went everywhere
From payment stickers on shop windows to boarding passes, restaurant menus, vaccine cards and Bitcoin wallet addresses, all of these codes follow one single sequence: the squares are found and oriented first, then the data is read. That sequence comes from one design decision in 1994 — three squares instead of four symmetric ones, with the empty corner speaking for the orientation — and billions of scans a day still run on that same decision.
And a lesson larger than QR: resilient systems keep a small, fixed core — parts deliberately kept simple and unchanged, so everything else is allowed to be flexible. QR shows this duality plainly: the data survives 30% damage, but the squares fail with a single stain — which is exactly why no error-correction level covers them. That difference is the core engineering decision: choosing what must not break.
takeaway.txt
Every scan starts with the three squares.